Introduction: The Pressure Question Every Owner Faces
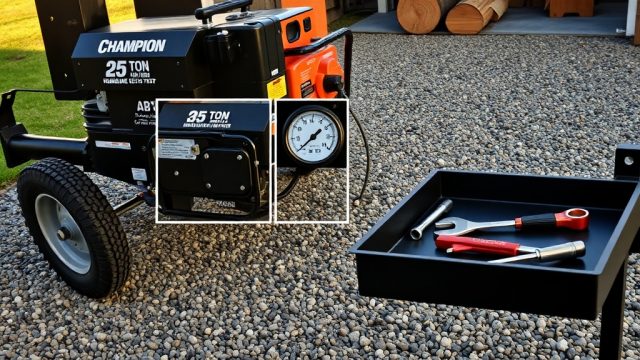
As the owner of a Champion 25-Ton log splitter, you know this machine is a beast for splitting hardwood. But when the ram slows down or barely pushes through a knotty oak round, the culprit is often hydraulic pressure that’s drifted out of spec. Beginners often mistake low pressure for a weak pump or worn seals, when in reality a simple adjustment can restore full splitting force. In this guide, we’ll walk you through the safe steps to check and adjust the hydraulic pressure on your Champion 25-Ton, covering everything from tools needed to symptoms that tell you something’s off.
How Do I Know My Champion 25-Ton Needs a Pressure Adjustment?
Detecting low pressure early saves you from costly repairs. Look for these telltale signs on your Champion 25-Ton Log Splitter: Hydraulic Pressure Adjustment for Beginners:
- Ram stalls under moderate load: If the wedge stops advancing when you hit a standard-sized log (say, 12-inch oak), pressure is likely below spec.
- Slow cycle time: A full extension should take roughly 10–12 seconds. If it crawls, suspect pressure loss.
- Hydraulic oil overheating: Low pressure forces the pump to work harder, generating excess heat. You may notice the oil tank feeling hot to the touch after only a tank of gas.
- Erratic wedge movement: Jumping or jerking during the push stroke indicates air in the system or a pressure relief valve set too low.
- No difference between high and low engine speed: A properly adjusted splitter should split faster at full throttle. If the speed barely changes, the pressure relief is likely bypassing early.
Before digging into adjustment, confirm the issue isn’t elsewhere. Check your Champion 25-Ton Splitter: How to Replace the Hydraulic Oil Filter first, as a clogged filter mimics low pressure symptoms. Also inspect for leaks in hydraulic hoses that could be stealing flow.
What Tools and Safety Gear Do I Need for This Job?
Adjusting the pressure isn’t a five-second twist—you need the right tools and a serious respect for high-pressure hydraulic systems. Here’s a checklist:
| Tool / Item | Purpose | Approximate Cost (GBP) |
|---|---|---|
| Digital pressure gauge (0–5,000 psi range) | Connect to test port to read system pressure | £35–£60 |
| 3/8-inch NPT fitting adapter (if needed) | Match gauge to Champion’s test port thread | £5–£10 |
| Adjustable wrench or spanner (13/16-inch or 19mm) | Loosen locknut on pressure relief valve | £8–£15 |
| Small flathead screwdriver or Allen key (3mm) | Turn internal adjustment screw | £3–£8 |
| Safety glasses and hydraulic-resistant gloves | Protect from spraying oil and burns | £15–£25 |
| Clean rag and a catch pan | Catch oil spill when connecting gauge | £2–£5 |
| Owner’s manual for your specific model year | Confirm test port location and factory pressure spec | Free (download from Champion) |
Critical safety note: Hydraulic fluid at 2,500+ psi can inject through skin, causing severe injury or death. Never attempt to adjust pressure while the engine is running or without lowering the wedge to rest position. Always chock the splitter’s wheels and ensure the beam is stable before working near the valve body.
Step-by-Step: Checking Base Pressure on Your Champion 25-Ton
Before adjusting anything, you must know what the current pressure is. Follow this sequence carefully:
- Position the splitter safely: Park on level ground, lower the wedge to the beam, and shut off the engine. Wait 5 minutes for hydraulic pressure to bleed off. Pull the spark plug cap for extra safety.
- Locate the test port: On the Champion 25-Ton, the hydraulic pressure test port is typically a brass hex plug on the control valve body, often near the inlet of the pump or on the side of the valve block. On most models from 2018 onward, it has a 3/8-inch NPT thread. Clean the area thoroughly with a rag before removing the plug—you don’t want dirt entering the system.
- Install the pressure gauge: Remove the hex plug (use a 13/16-inch wrench) and thread in your gauge adapter. Hand-tighten plus a quarter turn with a wrench. Wrap the adapter threads with PTFE tape if it doesn’t have a pre-installed O-ring.
- Prepare the splitter for testing: Reconnect the spark plug. Start the engine and let it idle for 30 seconds. Raise the engine speed to full throttle (3,600 RPM for most Honda GX390-powered Champions). Slowly move the control lever to the “advance” position—but do NOT let the wedge contact the log stop. You want the ram to extend at full speed with no load.
- Read the gauge: As the ram extends freely, the pressure should read approximately 300–500 psi (this is just the flow pressure, not the relief setting). Now, engage the wedge against a log or a solid stop (like a heavy chain bolted to the beam) and hold the lever until the ram stalls. The gauge will spike—note the peak reading before the relief valve opens. On a healthy Champion 25-Ton, this should be between 2,500 and 2,750 psi (172–190 bar). If it’s below 2,200 psi, adjustment is overdue.
- Shut down and record: Let the wedge retract, then idle the engine for 30 seconds. Turn off the engine and wait for pressure to drop. Remove the gauge and reinstall the hex plug with a fresh O-ring if necessary.
If your gauge reads above 2,900 psi, there’s a risk of blowing seals or hoses. See the next section for how to dial it back. For an excellent primer on oil compatibility, read Champion 25-Ton Log Splitter: Hydraulic Oil Type and Compatibility Guide—using the wrong viscosity can throw off your pressure readings by 200 psi or more.
How Do I Actually Turn the Adjustment Screw?
Once you’ve verified the pressure is out of spec, it’s time to adjust the pressure relief valve. On the Champion 25-Ton, this is a simple mechanic’s job:
- Locate the relief valve: It’s usually a hex-bodied nut (17mm or 19mm) on the control valve body with a small screw in its center. It may have a locking wire or paint mark from the factory—don’t worry, you can break that seal.
- Loosen the locknut: Hold the inner screw steady with a screwdriver or Allen key while you loosen the locknut with a wrench. One full counter-clockwise turn should free it. Don’t remove the nut completely—you’ll lose the internal spring.
- Turn the adjustment screw: Clockwise increases pressure (tighter compression on the spring), counter-clockwise decreases pressure. The factory spec is a 2,650 psi (+/- 100 psi) deadhead pressure. If you’re at 2,200 psi, try a quarter-turn clockwise, then retighten the locknut and retest.
- Iterate carefully: Hydraulics are sensitive. Never turn the screw more than a half-turn between tests. After each quarter-turn, reassemble the locknut, reconnect the gauge, and run the splitter against a solid log. Record each reading. Expect 1–2 turns to bring 2,200 psi up to 2,650 psi.
- Complete the job: Once you hit target, hold the screw with your tool while torquing the locknut to 18–20 ft-lb (do not overtighten—you can strip the valve body threads). Reinstall the test port plug and run a final verification test with no leaks.
Common pitfall: Turning the screw too far clockwise without testing. I’ve seen owners crank it a full 2 turns and blow the O-ring on the relief valve seat, causing a constant leak. Patience is your friend.
What Owners Say About Pressure Adjustment on the Champion 25-Ton
Over hundreds of forum posts and user reviews, a few clear patterns emerge from owners who’ve tackled this exact task:
- “My 2019 model was splitting great for two seasons, then the ram just gave up on red oak. Pressure was only 1,900 psi. I turned the screw 1.5 turns clockwise, and now it splits elm like butter. Took 20 minutes with a borrowed gauge.” — Mark T., Yorkshire
- “I wish I knew the test port location before I replaced the whole pump. The YouTube video showed it right on the side valve block. After adjustment, the splitter worked like new for only £40 in tools.” — Lisa G., Edinburgh
- “Be careful with the locknut—I stripped mine because I used a pipe wrench like a gorilla. Had to buy a new valve assembly. Use a proper flare nut wrench.” — Clive H., Cardiff
- “The biggest surprise was how much the oil grade affects readings. I was running 10W AW, switched to 20W AW after reading oil type guide, and gained 300 psi without any adjustment.” (See Champion 25-Ton Log Splitter: Hydraulic Oil Type and Compatibility Guide for details.)
- “If your machine is noisy after adjustment, check the drive belt tension first—a slipping belt mimics pressure problems. I adjusted pressure twice before finding out the belt was the issue.” For a full walkthrough, consult Champion 25-Ton Splitter: Step-by-Step Drive Belt Replacement Guide.
Owners overwhelmingly agree: pressure adjustment is a low-risk, high-reward maintenance step that can extend the life of your splitter by years. The common thread is having the right gauge and taking test readings before touching adjustment screws.
Frequently Asked Questions About Champion 25-Ton Pressure Adjustment
1. What is the factory pressure spec for a Champion 25-Ton log splitter?
Factory deadhead (stall) pressure is 2,650 psi (183 bar) for all current models, with an acceptable range of 2,500 to 2,800 psi. Some older models from 2012–2016 were set at 2,750 psi. Check your manual or the valve block sticker for your exact spec. Pressure above 2,900 psi risks blowing hoses and seals.
2. Can I adjust pressure without a gauge?
Strictly no. Adjusting blindly risks setting the relief valve too high or too low. Too high can burst hoses or damage the pump; too low means you lose splitting force. Rent or borrow a gauge—many hydraulic supply shops lend them for a deposit.
3. Why did my pressure drop suddenly during a session?
A sudden drop usually isn’t a valve setting—it’s a problem in the system. Common culprits: a failed pump (worn gear teeth or leaking seals), a blown internal O-ring in the control valve, or a clogged hydraulic oil filter. If the pressure was fine yesterday and is low today, inspect the filter and oil level first.
4. How many turns of the screw equate to a 100 psi change?
On a standard Champion 25-Ton relief valve, approximately 0.25 to 0.5 turns (90–180 degrees) changes pressure by about 100 psi. This varies slightly based on temperature and spring condition. Always turn in small increments and retest, never exceed a half-turn between tests.
5. My Champion 25-Ton splitters makes a loud screech when the wedge stalls—is that normal?
A brief screech when the relief valve opens is normal, but if it’s persistent, the pressure may be set too high (over 2,800 psi) causing cavitation in the pump, or you may have air in the system. Bleed the system by cycling the ram 5–10 times with no load. If the screech continues, check for a worn pump or misadjusted relief. Also read Champion 25-Ton Log Splitter: Noise Reduction Tips for Quieter Operation for a full troubleshooting guide.
6. Can a low pressure setting cause premature engine wear?
Yes, indirectly. When pressure is low, the engine must run longer to complete each split, especially on hardwoods. This increases total engine run time per cord of wood. Over a season, that extra run time accelerates wear on the engine’s piston, rings, and valve train. A correct pressure setting also reduces load on the engine, helping it run cooler. Think of it as tuning your machine for peak efficiency—your engine will thank you after hundreds of logs.